SUBSCRIBE TO OUR NEWSLETTER
Stay informed! Sign up to get expert advice and insight delivered direct to your inbox
Learn how to use the popular network sniffer in this excerpt from "Applied Network Security."
July 12, 2018

Network sniffing is a collection of packet data that is transmitted throughout the network. Network sniffing is also known as packet analysis. There are different types of network sniffers. Two of the most common are Ethernet sniffers and wireless sniffers. A network sniffer is a piece of software or hardware that can capture and log network traffic.
Nmap is a popular network sniffing tool used by many cyber security professionals. Before using this tool, you must learn how to install it. You also need to be able to check the version and locate the user manual. It is recommended that you use Kali Linux as the operating system when using Nmap. Kali Linux comes with many pre-installed tools such as Nmap and Wireshark. If you are using a version of Linux without pre-installed tools, you must perform a fresh install. The best and most efficient way to install Nmap is to clone the repository location directly from GitHub.
First, open Firefox in Kali Linux and navigate to a search engine such as Google. In the search bar, type Nmap github. The link you want will be https://github.com/nmap/nmap. You can also type the link into the URL address bar instead of using a search engine. On the GitHub page, click on the green button that says Clone or download. This button is located on the right side, towards the top of the page. The following screenshot displays where the Clone or download button is located:
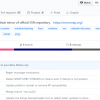
(Click on image for larger view)
When you click on the green Clone or download button, a text box will appear with a URL, namely https://github.com/nmap/nmap.git. This is the location of the repository, which also includes the branches and tags. The cloning install method automates the file compilation process, saving time, and making sure everything is in place. Open a terminal in Kali Linux and type, git clone https://github.com/nmap/nmap.git to begin the cloning process. After this command is entered, the tool will be downloaded and installed automatically.
After the install is complete, you will need to confirm that you are using the latest version of Nmap. To check which version of Nmap you have type, nmap -V. If you want to see a list of Nmap commands, type -h to bring up the help menu. According to www.nmap.org, the primary documentation for using Nmap is the Nmap reference guide. It is also the basis for the Nmap manual page. The manual page can be found using the URL https://nmap.org/book/man.html. If you want to install Nmap from the source code using Linux, you will need to download it from https://nmap.org/download.html. The files will be compressed and offered in two formats. The first format will be .tar.bz2 and the second format will be .tgz. The compressed files are also known as tarballs. A tarball or TAR file is used to combine lots of files into a single archive. This is similar to the .zip files found in Windows.
After the Nmap tarball is downloaded, you will need to decompress it by typing the command bzip -cd nmap-.tar.bz2 | tar xvf -. Next, you will need to change into the recently created directory by typing cd nmap-. Now you need to configure the build system by typing ./configure while still in the nmap directory. Next, you will build Nmap by typing make. If the make command doesn't work type gmake. The next step is making sure you have the correct user privileges for a system-wide install by typing su root. The final step is installing the support files for Nmap by typing make install. Both install methods can be applied to other tools that you will need to install in the future.
Why network sniffing is important
Network sniffers, also known as network analyzers, are great tools to use for network security. Threat hunters will use these tools to uncover potential attacks and weak points in the network. Network sniffing allows for detailed network analysis. When protecting a network, it is important to have as many details about the packet traffic as possible. By actively scanning the network, a threat hunter can stay vigilant and respond quickly to attacks.
Scan a single IP
This command scans a single IP on the network. If a threat hunter notices strange activity coming from an unfamiliar host, a single IP scan may be useful. Being able to quickly distinguish false positives from false negatives is critical for efficient network security. For example, a network attack might go unnoticed because too many false positives are triggering alerts, creating alert noise.
The alert noise can potentially hide an attack from detection by creating a false negative. The noise also creates confusion and misdirection for the security analyst trying to determine if the attack is real or not. Using an intrusion detection system with an updated attack signature database will help distinguish false positives from false negatives more efficiently. Also, it is important to remember that having too many false negatives can also cause problems. If the intrusion detection system misses an attack, no alerts are activated. This gives the security analyst the illusion that the network is safe and secure, which may not be the case. This is a major issue because an attack could be going on and nobody would be aware of it until it was too late:
nmap 192.168.0.9

sniffers-2.jpg
Scan a host
This is the command to scan a single host. The information gained from this command can allow a hacker to quickly evaluate a high-value target on the network. Sometimes a hacker may be going after a specific host containing financial data records:
nmap www.google.com

sniffers-3.jpg
NEXT Page: More commands
Scan a range of IPs
This is the command to scan a range of IPs. Scanning a range of IPs is useful when trying to determine where a network attack may be occurring. Being able to scan multiple IPs also saves valuable time when tracing a network attack:
nmap 192.168.0.1-20

sniffers-4.jpg
This command scans a subnet. Scanning a subnet will allow the scan to monitor multiple hosts. This command is useful when checking on multiple networks as well:
nmap 192.168.0.1/24

sniffers-5.jpg
Nmap port selection
To utilize Nmap effectively, you will need to understand how to use the port selection options. The port selection options determine what ports will be scanned and whether the scan order is random or in a sequential order.
Scan a single port
This is the command to scan a single port. Some malware will consistently operate on a specific port on every host it infects. By knowing these ports, you can sometimes quickly determine what kind of malware you are dealing with. A single port scan would be useful in this situation:
nmap -p 80 192.168.0.9

sniffers-6.jpg
Scan a range of ports
This is the command to scan a range of ports 1-100. The versatility of this command allows you to focus on specific ranges of ports:
nmap -p 1-100 192.168.0.9

sniffers-7.jpg
Scan 100 most common ports (fast)
These are a number of different default scans. -f will scan the most common 100 ports used:
nmap -f 192.168.0.9

sniffers-8.jpg
The preceding is the command to scan the most common ports. Some common examples would be ports 20, 21, 23, 25, and 53, to name a few. This is known as a fast scan.
Scan all 65535 ports
This is the command to scan all ports. There are a total of 65,535 ports. A hacker will not usually employ this type of scan. Instead most hackers will initially use a scanning technique known as half-open scanning. The scan all ports command is better utilized by a threat hunter monitoring the network:
nmap -p- 192.168.0.9

sniffers-9.jpg
Nmap port scan types
There are many different types of port scan that can be used with Nmap. It is important to know which type of port scan to use depending on your objective. For example, if you want to determine which TCP ports are active on a targeted host, run a TCP port scan. Hackers will often use various port scans to see if they can find a vulnerable open port to use as an attack vector.
Scan using TCP SYN scan (default)
This command determines whether the port is listening. Using this command is a technique called half-open scanning. It is called half-open scanning because you don't establish a full TCP connection. Instead, you only send a SYN packet and wait for the response. If you receive a SYN/ACK response that means the port is listening:
nmap -sS 192.168.1.1

sniffers-10.jpg
Scan using TCP connect
This is the command to scan using the TCP connect option. If a user does not have raw packet privileges, this is the command they will use:
nmap -sT 192.168.0.9

sniffers-11.jpg
Privileged access is necessary to perform the default SYN scans. If privileges are not sufficient, a TCP connect scan will be used. A TCP connect scan needs a full TCP connection to be established, and is known to be a slower scan than SYN scans. Disregarding discovery is often required as many firewalls or hosts will not answer to ping, so it could be missed, unless you choose the -Pn parameter. Of course, this can make the scan times much longer as you could end up sending scan probes to hosts that are not even there.
NEXT Page: More commands
Service and OS detection
Nmap is one of the most popular tools used for the enumeration of a targeted host. Nmap can use scans that provide the OS, version, and service detection for individual or multiple devices. Detection scans are critical to the enumeration process when conducting penetration testing of a network. It is important to know where vulnerable machines are located on the network so they can be fixed or replaced before they are attacked. Many attackers will use these scans to figure out what payloads would be most effective on a victim's device. The OS scan works by using the TCP/IP stack fingerprinting method. The services scan works by using the Nmap-service-probes database to enumerate details of services running on a targeted host.
Detect OS and services
This is the command to scan and search for the OS (and the OS version) on a host. This command will provide valuable information for the enumeration phase of your network security assessment (if you only want to detect the operating system, type nmap -O 192.168.0.9):
nmap -A 192.168.0.9

sniffers-12.jpg
Standard service detection
This is the command to scan for running service. Nmap contains a database of about 2,200 well-known services and associated ports. Examples of these services are HTTP (port 80), SMTP (port 25), DNS (port 53), and SSH (port 22):
nmap -sV 192.168.0.9

sniffers-13.jpg
More aggressive service detection
This is the command for an aggressive scan. Usually, experienced hackers will not use this command because it is noisy and leaves a large footprint on the network. Most black hat hackers prefer to run as silently as possible:
nmap -sV --version-intensity 5 192.168.0.9

sniffers-14.jpg
Lighter banner-grabbing detection
This is the command for a light scan. A hacker will often use a light scan such as this to remain undetected. This scan is far less noisy than an aggressive scan. Running silently and staying undetected gives the hacker a major advantage while conducting enumeration of targeted hosts:
nmap -sV --version-intensity 0 192.168.0.9

sniffers-15.jpg
Service and OS detection depend on different techniques to determine the operating system or service running on a certain port. A more aggressive service detection is useful if there are services running on unexpected ports, although the lighter version of the service will be much faster and leave less of a footprint. The lighter scan does not attempt to detect the service; it simply grabs the banner of the open service to determine what is running.
Nmap output formats
Save default output to file
This command saves the output of a scan. With Nmap, you can save the scan output in different formats:
nmap -oN outputfile.txt 192.168.0.12

sniffers-16.jpg
Save in all formats
This command allows you to save in all formats. The default format can also be saved to a file using a file redirect command, or > file. Using the -oN option allows the results to be saved, but also allows them to be viewed in the terminal as the scan is being conducted:
nmap -oA outputfile 192.168.0.12

sniffers-17.jpg
Scan using a specific NSE script
This command will search for a potential heartbleed attack. A Heartbleed attack exploits a vulnerability that is found in older, unpatched versions of OpenSSL:
nmap -sV -p 443 -script=ssl-heartbleed.nse 192.168.1.1

sniffers-18.jpg
Scan with a set of scripts
This command is useful when searching for multiple types of attack. Using multiple scripts will save time and allow for better efficiency while monitoring the network. You can also use the following command to scan for heartbleed attacks:
nmap -sV -p 443 --script=ssl-heartbleed 192.168.0.13/24
It is important to keep an updated database of current scripts. To update the Nmap script database, type the command nmap - -script-updatedb . The following screenshot demonstrates the screen you will see when you run this command:

sniffers-19.png
Currently, Nmap has 471 NSE scripts installed. The scripts allow you to perform a wide range of network security testing and discovery functions. If you are serious about your network security, then you should take the time to get familiar with some of the Nmap scripts.
The option --script-help=$scriptname will show help for the individual scripts. To get a list of installed scripts, use the command locate nse | grep script.
You may have noticed the -sV service detection parameter. Usually, most NSE scripts will be more effective, and you will get better scans by using service detection.
This tutorial is a chapter excerpt from "Applied Network Security" by Arthur Salmon, Warun Levesque, and Michael McLafferty. Through Packt's limited-time offer, buy it now for just $5, or get it as part of the Security for Sysadmin eBook bundle for just $15.